
How did i created this blog
Sylvain Roh |
Introduction
In this blog post, we will explore how I created this dynamic blog using Next.js 13, a powerful React framework, and stored all the blog posts as Markdown files. This setup allows for easy content management and seamless rendering of blog posts on the client-side. Let's dive in and discover the key aspects of this setup.
Next.js 13
Next.js is a popular React framework that combines server-side rendering, static site generation, and client-side rendering to provide a versatile and efficient development experience. With the release of Next.js 13, new features and improvements further enhance the developer experience and performance of Next.js applications.
Storing Blog Posts as Markdown Files
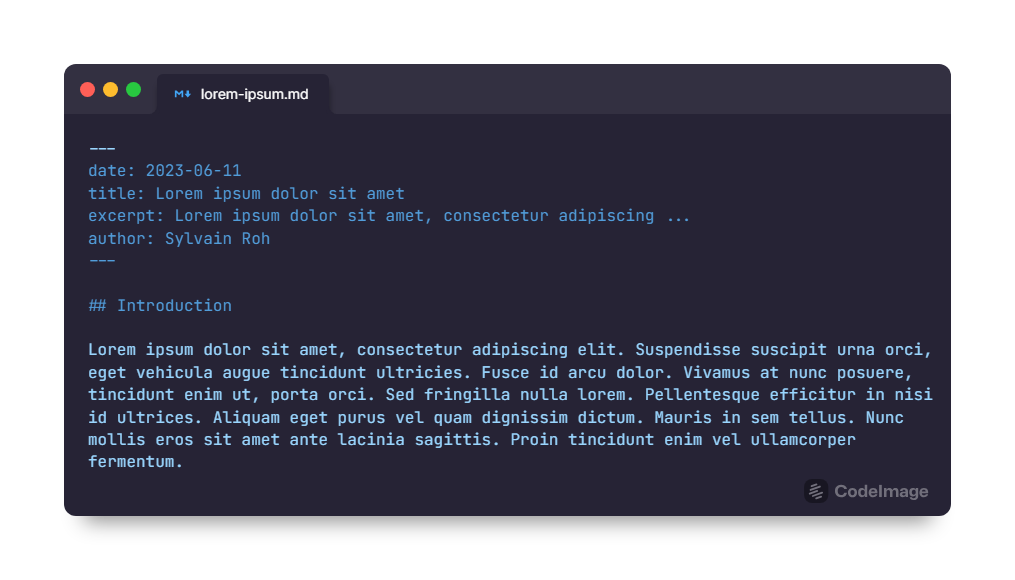
Instead of using a database or content management system, I opted to store my blog posts as Markdown files. Markdown is a lightweight markup language that provides a simple and intuitive way to format text content. Each blog post is written in Markdown format, making it easy to create, edit, and version control the content.
Advantages of Using Markdown
- Easy Content Creation: Markdown syntax is straightforward and easy to learn, allowing for quick content creation without distractions from complex formatting.
- Version Control: Since blog posts are stored as Markdown files, they can be easily managed and versioned using popular version control systems like Git. This provides a transparent and reliable way to track changes over time.
- Portability: Markdown files can be easily moved, shared, and backed up, providing flexibility and portability for your blog content.
- Separation of Concerns: By separating the content from the presentation layer, Markdown enables a clear separation of concerns and promotes content reusability across different platforms and mediums.
Rendering Markdown with Next.js:
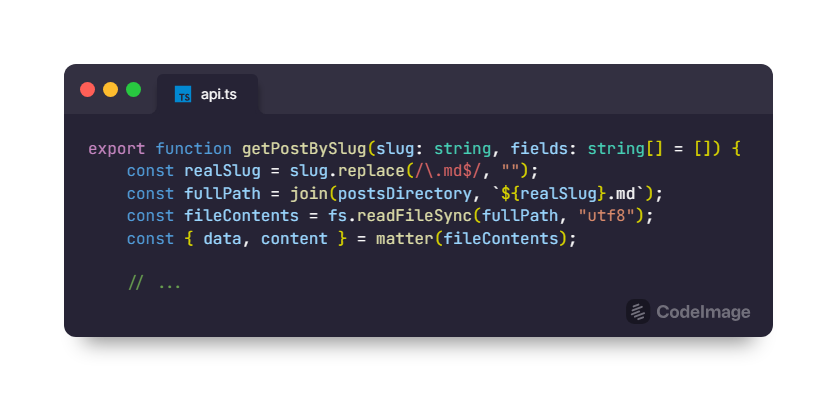
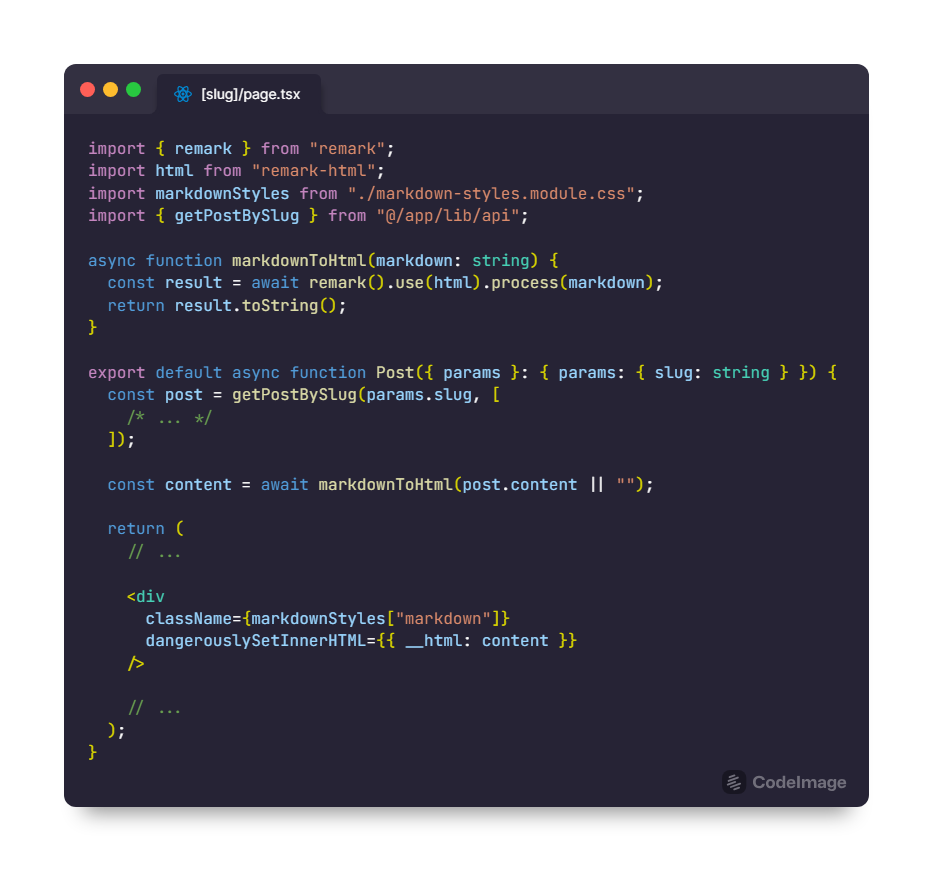
Next.js provides excellent support for rendering Markdown content. By leveraging powerful libraries like remark and gray-matter, we can parse the Markdown files and extract the necessary metadata and content. This metadata can include information such as the blog post title, author, date, and any other custom fields.
With Next.js, we can create dynamic routes that correspond to each blog post's URL based on its file name or metadata. When a user requests a specific blog post, Next.js will fetch the corresponding Markdown file, parse it, and render it as HTML to be displayed on the client-side.
Benefits of Next.js for Blogging
- Server-side Rendering: Next.js offers server-side rendering capabilities, allowing blog posts to be rendered on the server and sent as fully formed HTML to the client. This results in improved performance and search engine optimization.
- Static Site Generation: Next.js also supports static site generation, which pre-renders the blog posts at build time. This approach generates static HTML files for each blog post, resulting in faster load times and reduced server load.
- Client-side Rendering: For dynamic blog functionality like comments or interactive elements, Next.js can seamlessly switch to client-side rendering, providing a smooth and interactive user experience.
Conclusion
Creating a blog with Next.js 13 and storing the blog posts as Markdown files offers a powerful and flexible solution for managing and rendering content. The combination of Next.js's features and the simplicity of Markdown provides an efficient workflow for content creators while ensuring optimal performance and a great user experience.
Whether you're starting a personal blog or building a content-driven website, Next.js 13 and Markdown files offer a robust foundation to create and manage engaging blog posts.